 Most of you should recognize the object in the photo to my left; it's the Lunar Module (or Lunar Excursion Module if you like). It's the craft that the astronauts used to land and take off from the moon in the 1960s and 70s. I have a special attachment to the LM and to all things NASA and I have my mother to thank for that.
I watched every Mercury, Gemini, and Apollo spacecraft take off and land. My mother held me out of school whenever NASA did something that was televised. She felt that watching history as it happened was more important than reading about past history.
The moon landing happened while I was in junior high school and I belonged to a Space Club. The Space Club built and flew model rockets and was a lot of fun. Around the time of the first moon landing, Shell or one of the other gas station chains gave away a sheet of perforated paper, card-stock thick, that if you punched it out and followed the instructions, would fold into a Lunar Module. I had a couple of them (wish I still had them) that I built and one day decided to make one that actually flew. I set out to make a model rocket Lunar Module.
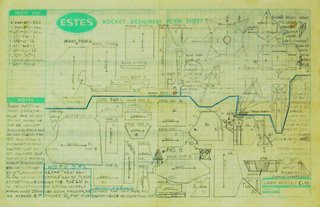
Now the first and most obvious problem is that the LM was never designed to fly in air. It's lopsided and out-of-balance as all hell and let's not even discuss wind resistance. It has far too much. But I wasn't going to let a little thing like physics stop me. I knew this would be a real challenge, so I decided to document the process, in case anyone else ever wanted to make one. Estes, the biggest maker of model rockets (then and now) had the sheets you could lay out your own designs on. I picked one up at the hobby store (I think they were free) and set to work laying out my LM.
 The basic design was pretty easy, I made my LM the exact same size as the cardboard LM by cutting one apart and then cutting pieces of balsa wood the same size and shape. This actually turned into a lot of work; the LM has a lot of pieces.
I made a couple of changes to the design. First, I made the legs thicker since they were made out of balsa wood. I also put weights in the body in places to compensate for the unbalanced shape. But the biggest change was the ones you were not supposed to see.
I ran a clear plastic straw out of the top of the LM straight up (in my instructions I said to use a wooden dowel, but the clear plastic straw was harder to see). To do something about the wind resistance, I draped a large square of heat-n-shrink (you know, that clear plastic they wrap meat up with in the supermarket) over the top of the LM, centered on the top of the straw and glued the corners to each of the LM's feet. I then pulled out the sides to expose the excess heat-n-shrink and cut it away with scissors. Once it had dried I put the thing in the oven for four or five seconds and the heat-n-shrink shrunk, forming a clear plastic cone over the oddly shaped Lunar Module.
I then attached a clear parachute that I would basically drape over the model before take off. It sounds like this would not work, but it did.
I completed the model on March 23,1970 and attempted to fly it for the first time on March 27th. As I recall as I pressed the launch button, the solid rocket engine in the bottom of the LM fell out, ignited and spun around under the model, setting it on fire. We quickly put it out, but it was an embarrassing debacle for me as everyone thought I was crazy to even attempt this.
But I was undaunted and on May 9, 1970 I made another attempt to get my repaired Lunar Module off the ground. According to the stat sheet I have, it only rose about 10 feet off the launch pad and was in the air under power for only three seconds. I tried again with a much bigger engine and it flew to about 30 feet in a very stable flight.
The fun part of the LM model was watching it come down on the parachute cause it looked so cool. The only other flight I have stats for was a month later on June 6, 1970 and it was a mirror of the previous flight. The other kids in the Space Club didn't make fun of me after that; they thought it looked pretty cool too.


No comments:
Post a Comment